


No, you don’t need a license for riding Ebike. Please read Safety Instructions carefully for your safety.
You can check the Battery and Charger of our E-BIKE USER MANUAL. The methods are listed in the manual with more detail.
Check our blog article about how to maintain your battery.
You can check our Compare Models for the differential of our Ebike.
We recommended you to take off the battery. Then, you can clean the E-bike as the normal bike.
Before You ride, We strongly recommend you read our E-BIKE USER MANUAL for your safety.
3-4 years.
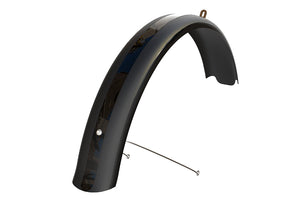
We send a wrench, bicycle pump and full fender, with our Ebike.
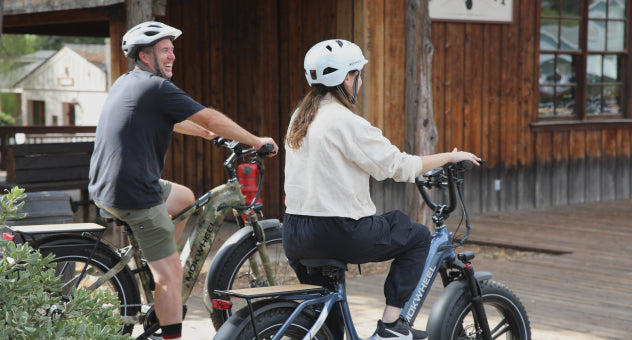
The recommended height is 5"4 or higher.
The order will be process in 48 business hours. Once the order has shipped, a shipping confirmation email will be sent to your email. We use FedEx or UPS for shipping. Please allow 2~7 business days for the shipment to arrive to your designated location Any delivery dates provided by Mokwheel are estimates.
We only ship to the lower 48 states in the US, please check Shipping for more information
The Ebike is mostly assembled when it arrives, a few more steps to finish the assembling. Please carefully watch the assembly tutorial or read the E-BIKE USER MANUAL for installation.
Click here to check your status.
Sorry that only one coupon can be used on one order, we do not support stacking coupons. Thanks for your understanding.
Final interpretation is owned by the Mokwheel company.
If your Mokwheel E-Bike is not working, check the cables to make sure they did not come loose or unplugged. Simply unwrap the black spiral wire covering until the Quick Disconnect fitting is exposed, unplug and re-plug the Quick Disconnect fitting(s).
Troubleshooting Guide
1. Brake error
Check whether the brake cable is loose or dam- aged. If there is no damage, replace the brake or brake lever and cable.
2. Power-assist sensor error
Step one: Check whether the sensor cable is loose or falling off. If not, it may be due to the damage of the power-assist sensor. Step two: Remove and replace the power-assist sensor.
3. Walk Cruise mode error
Shut down and restart the Ebike (if this issue cannot be solved, consider replacing the controller).
4. Real-time mode error
Shut down and restart the Ebike (if this issue cannot be solved, consider replacing the controller).
5. Low voltage error
Step one: Remove the battery to check if there is enough battery power. Step two: Charge the battery. Step three: If the issue is not solved after completing the previous two steps, it may indicate motor damage. Replace the motor.
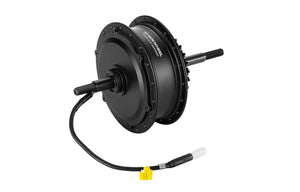
6. Motor error
Check whether the motor connecting cable is loose, falling off, or plugged in backward (if not, it may indicate motor damage, consider replacing the motor).
7. Thumb throttle error
Check whether the connecting cable is loose or falling off (if not, it may indicate thumb throttle damage, replace the thumb throttle).
Tools Needed:
Needle nose pliers
Hex keys
Replacement brake pads
Step 1: Brake Pad Removal
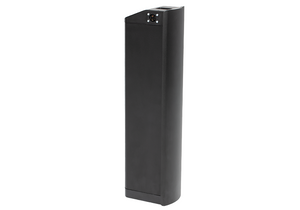
1. Get the bike ready for maintenance. First turn off the bike to remove the battery.
2. Locate the brake pads. The brake pads are located inside the brake caliper on each wheel (see photos for reference)
3. Remove the brake caliper first. Use a hex key to remove the two brake caliper bolts from the bike frame(Warning: Be careful not to lose or misplace the washers inside of the brake caliper bolts.)
4. Carefully straighten the retention pin using needle-nose pliers to remove the brake caliper by pushing it upwards.
5. Remove the old brake pads. The pin and the old brakes can be removed by pressing the leaf spring.
Step 2: Brake Pad Installation
1. Install the new brake pads into the brake caliper. Assemble the brake pads in the same configuration as the old pads. The friction material should be facing each other. Make sure the top hole of each pad is aligned with the retention pinhole. Slide the new brakes into the caliper to complete installation.
2. Replace the brake retention pin. Make sure the brake caliper is secure by carefully bending the retention pin to a 90°angle with needle-nose pliers.
3. Reinstall the caliper. Position the caliper so that the mounting holes on the frame align with the mounting points on the caliper. Using a hex key, insert the bolts and evenly tighten both bolts.
4. Before riding the bike, reinstall the battery and test the brakes to ensure proper installation.
Tip: The best way to maintain your brakes is to use both brakes together and engage the rear brake first to avoid excessive strain on the front wheel and fork.
The brake adjustment will involve:
• Checking the wheel to make sure it is fully seated in the frame dropouts. An improperly seated wheel can cause the brake disc to rub against the brake pads and generate noise.
• Checking that the brake disc is straight and in good condition. Damaged or dirty brake discs can result in reduced brake performance or noise.
• Centering the brake caliper by adjusting the positioning so the inner pad, a stationary component of the brake caliper, is close and parallel to the brake discs. A brake pad or brake caliper that is not properly positioned can lead to reduced brake performance or noise.
• Adjusting the brake cable tension and checking the brake lever. These final adjustments will help ensure the brakes were adjusted correctly.
Get the bike ready for maintenance. Remove the battery and press and hold the power button for 10 seconds to discharge the remaining power.
1. Remove the left crank first. Unscrew the bolt with a hex key and insert a crank puller to remove the crank.
2. Move onto the right crank with the same steps, remove the bolt first with a hex key and insert a crank puller into the opening.
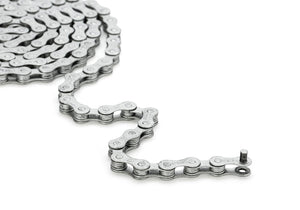
3. Test the chain once new cranks are installed. The bike needs to be propped on the kickstand so that the rear wheel is elevated, and the cranks must be rotated backward to rotate the rear wheel. Ensure that the chain is properly attached to the chain ring.
PAS Sensor Troubleshooting
Crank should be removed (refer to crank removal guide)
1. Locate the PAS sensor behind the left pedal to check if it’s loose.
2. If the PAS sensor is not loose, trace the cable coming out of the PAS sensor to the connector.
3. Unplug the PAS sensor connector and take out the controller.
4. Location the connecting cable between the controller and PAS sensor to check if it’s loose.
5. Inspect the inside of the connector for dirt, damage, or moisture. If there is dirt, damage, or moisture inside the connector, the sensor may need to be replaced.
PAS Sensor Replacement
1. Remove the old PAS sensor, unplug the cable from the main controller and pull free.
PAS sensor Installment
1. Install the new sensor, make sure the side with arrow is facing towards the bike.
Before riding the bike, reinstall the battery and test it fully.
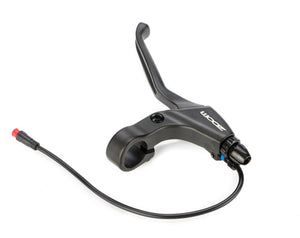
1. To remove the brake levers, first loosen the brake cables from the brake caliper.
2. Squeeze the levers to show the innner mechanism and release the brake cable cap from the levers.
3. Next disconnect the connecting wire for the brakes by pulling away and loosen the bolts on the lever to remove.
1. Remove the wheels first before removing the brake discs (see wheel replacement guide for help).
2. Use a hex key to remove the five bolts securing the disc onto the wheel and simply lift the disc to remove.
1. To remove the shifter, snip off the tip of the shifter cable and release it from the derailleur.
2. After removing the brake grip, throttle, and brake lever(see brake grip, throttle, and brake lever replacement guide), unscrew the bolt from underneath the shifter and slide off to remove along with the shifter cable from inside the hollow wire housing.
3. When installing the new shifter, insert the cable into the wire housing and push through.
1. Cut the zip ties to release the connecting wire and unplug by pulling apart. Then unscrew the bolts behind the rearlight to remove.
1. To remove the throttle, the handle grips have to be removed first(see handle grip replacement guide).
2. Loosen the bolt and disconnect the wire connecting to the throttle. Pull the throttle off the handlebar to remove.
1. Push the derailleur forward to release the chain from the crank.
2. Unscrew the outer chip from the derailleur to release the chain fron the derailleur.
3. Unscrew the bolt for the middle chip of the derailleur.
4. Unscrew the center bolt which connects the derailleur onto the bike to remove.
5. Once removed, loosen the screw holding the shifter cable and twist off the cable from the derailleur.
Installation Guide
1. To install, attach the derailleur to the bike first.
2. Next install the middle chip with the chain going over it.
3. Install the outer chip with the chain going over it as shown.
4. Lastly, insert the shifter cable back into the derailleur and tighten.
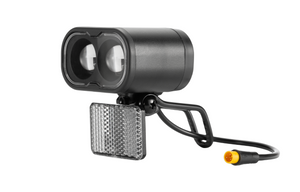
1. Unscrew the headlight bolts from the front fender and disconnect the wire to remove the headlight.
1. Get the bike ready for maintenance. Remove the battery and press and hold the power button for 10 seconds to discharge the remaining power.
2. Test the alignment. Rotate the pedals forward while simultaneously shifting gears with one hand. Be sure that the chain moves smoothly to each gear when you use the derailleur. Test by turning the wheels one to two full turn at a time.
a. The shifter cable tension may be too tight. Loosen the barrel adjuster on the derailleur. Loosen the barrel adjuster on the derailleur by turning it half or one full turn.
b. The shifter cable may be too loose. Tighten the barrel adjuster on the derailleur. The derailleur barrel adjuster should be turned half a turn to a full turn.
3. Shift between all gears to test the alignment. Using one hand, turn the cranks forward while adjusting the gears simultaneously. Be sure that the derailleur moves the chain smoothly from 1st gear to the 7th gear.
4. Before riding the bike, reinstall the battery and test it fully.
The wiring harness connects various electrical components on your bike. If instructed by MokWheel Product Support to perform a wiring harness connector check, follow the steps below to check that the connector is plugged in and in working order.
Tools Needed:
Hex keys
Get the bike ready for maintenance. Remove the battery and press and hold the power button for 10 seconds to discharge the remaining power.
Flip over the bike and rest on the handlebars in order to prevent damage to the LCD display while performing maintenance.
1. Locate and take out the controller.
2. Check if the connecting cable is loose, unplug and reconnect again. The connector must be unplugged by pulling both sides straight apart, without twisting. If it looks normal on the inside, align the internal notch and pins and press directly together, without twisting.
3. Reinstall the controller following the steps mentioned above.
4. Before riding the bike, reinstall the battery and test it fully.
Tools needed:
Pliers
Hex keys
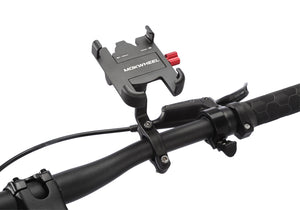
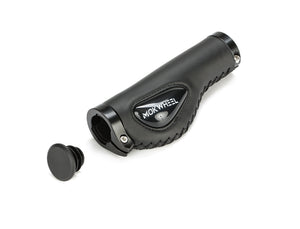
1. To remove the handlebar, loosen the handle grip bolts first.
2. Then pry off the handlebar caps and slide the handle grips off the handlebar.
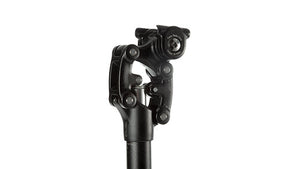
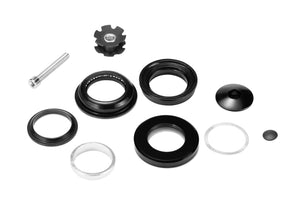
Stem Removal
3. Loosen the side bolts on the handlebar stem and remove the middle bolt from the center of the stem. Then pull the stem away from the fork.
Tools Needed:
Hex key
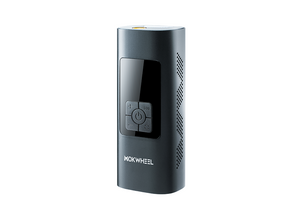
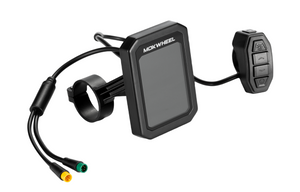
Step 1: LED Display Removal
1. Getting the bike ready for maintenance. Remove the battery and press and hold the power button for 10 seconds to discharge the remaining power.
2. Unplug the LED Display connector. Follow the cable from the back of the LED Display to the wiring harness.
3. Disconnect the LED Display from the connected cable by pulling both ends apart without twisting.
4. Remove the LED Screen. Use an hex key to loosen the bolts connecting the LED Screen and pull away from the handlebars.
5. Remove the Odometer Controls. Loosen the clamp bolts with an hex key and remove.
Kickstand Removal
1. Remove the bolts for the kickstand that is attached onto the chainstay.
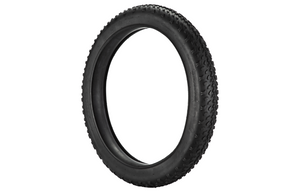
Front Wheel Removal
(This is done similar to when you first installed the wheel)
1. Flip over the bike and stabilize the bike on the handlebar
2. Remove the two front wheel bolts at each side with a wrench. Locate and loosen front wheel bolts and remove them with a wrench.
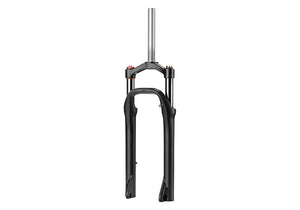
3. Remove the front wheel. Lift the front wheel gently off the front fork
Back Wheel Removal
1. Flip the bike around and remove the kickstand first(see above), and then unscrew the bolts attaching the back wheel.
2. Cut the zip ties and disconnect the motor wire.
3. Move the derailler out fo the way and lift the back wheel. Isolate the back wheel by removing the brake disc(see brake disc removal).
Check our blog article about how to maintain your battery.
You can check our Compare Models for the differential of our Ebike.
We recommended you to take off the battery. Otherwise, you can clean the E-bike as the normal bike.
3-4 years.
The order will be process in 48 business hours. Once the order has shipped, a shipping confirmation email will be sent to your email. We use FedEx or UPS for shipping. Please allow 2~7 business days for the shipment to arrive to your designated location Any delivery dates provided by Mokwheel are estimates.
The Ebike is mostly assembled when it arrives, a few more steps to finish the assembling. Please carefully watch the assembly tutorial or read the E-BIKE USER MANUAL for installation.
Click here to check your status.
The Extended Warranty is a value-added after-sales service offered by Mokwheel to continue protecting key components of your e-bike after the original factory warranty expires. It is not insurance and does not cover accidental damage, theft, or external causes.
The coverage period depends on the plan you choose — typically 1 year or 2 years.
The Extended Warranty covers non-human-caused failures of the motor, battery, controller, display, wiring, and electrical system under normal use, as well as abnormal battery degradation. It also includes one major component replacement service.
The warranty does not cover accidental damage (such as crashes, water ingress, or impacts), consumable parts (brake pads, tires, chains, etc.), external causes (fire, theft, weather, etc.), or cosmetic issues.
Contact Mokwheel’s after-sales support via email or phone and provide your proof of purchase and product serial number. Once your claim is verified as eligible, Mokwheel will offer free repair, replacement, or in special cases, a refund. a